
MCP 是一种开放协议,它标准化了应用程序如何为 LLMs.将 MCP 视为 AI 应用程序的 USB-C 端口。正如 USB-C 提供了一种将设备连接到各种外围设备和配件的标准化方式一样,MCP 也提供了一种将 AI 模型连接到不同数据源和工具的标准化方式。
为什么选择 MCP?
MCP 可帮助您在 LLMs.LLMs 经常需要与数据和工具集成,MCP 提供:
- 越来越多的预构建集成,您可以直接LLM插入其中
- 在提供商和供应商之间LLM灵活切换
- 在基础架构中保护数据的最佳实践
一般架构
MCP 的核心遵循客户端-服务器架构,其中主机应用程序可以连接到多个服务器:
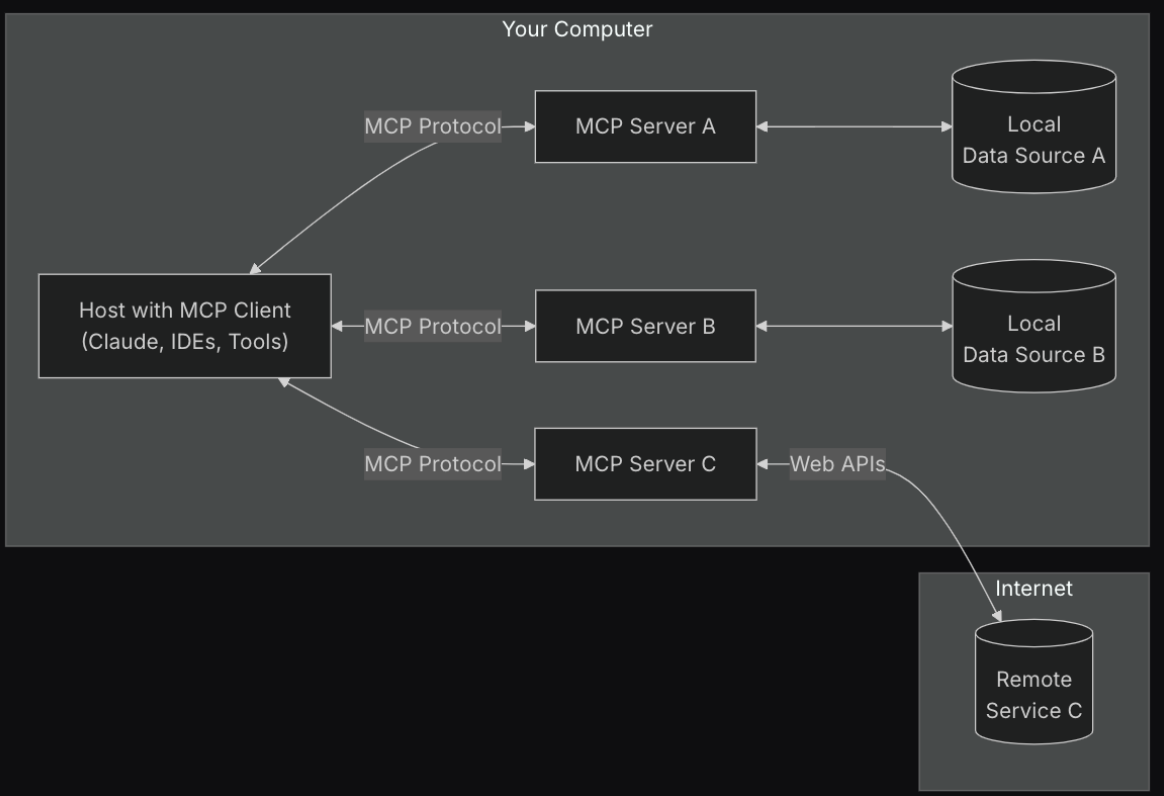
- MCP 主机 :希望通过 MCP 访问数据的 Claude Desktop、IDE 或 AI 工具等程序
- MCP 客户端 :与服务器保持 1:1 连接的协议客户端
- MCP 服务器 :轻量级程序,每个程序都通过标准化的模型上下文协议公开特定功能
- 本地数据源 :MCP 服务器可以安全访问的计算机文件、数据库和服务
- 远程服务 :MCP 服务器可以连接到的互联网(例如,通过 API)提供的外部系统
快速入门
面向服务器开发人员
开始构建您自己的服务器,以便在 Claude for Desktop 和其他客户端中使用。
在本教程中,我们将构建一个简单的 MCP 天气服务器并将其连接到主机 Claude for Desktop。我们将从基本设置开始,然后进入更复杂的使用案例。
我们将构建什么
许多公司LLMs目前无法获取天气预报和恶劣天气警报。让我们使用 MCP 来解决这个问题!
我们将构建一个公开一个工具的服务器: get-forecast。然后,我们将服务器连接到 MCP 主机(在本例中为 Cline):
服务器可以连接到任何客户端。为了简单起见,我们在这里选择了 Claude for Desktop,但我们也在此处提供了[有关构建您自己的客户端](https://modelcontextprotocol.io/quickstart/client)的指南以及其他[客户端的列表](https://modelcontextprotocol.io/clients) 。
核心 MCP 概念
MCP 服务器可以提供三种主要类型的功能:
- 资源 :客户端可以读取的类似文件的数据(如 API 响应或文件内容)
- 工具 :可由 LLM(经用户批准)调用的函数
- 提示 :帮助用户完成特定任务的预先编写的模板
本教程将主要使用 python 演示,更多示例,请参考官方文档。
让我们开始构建我们的天气服务器吧! 您可以在此处找到我们将要构建的内容的完整代码。
必备知识
本快速入门假定您熟悉:
- python
- LLMs(比如 Claude)
系统要求
- 已安装 Python 3.10 或更高版本。
- 您必须使用 Python MCP SDK 1.2.0 或更高版本。
设置环境
首先,让我们安装 uv 并设置我们的 Python 项目和环境:
curl -LsSf https://astral.sh/uv/install.sh | sh
macOS 可以使用 brew 安装:
brew install uv
确保之后重新启动终端以确保获取 uv 命令。
现在,让我们创建并设置我们的项目:
# Create a new directory for our project
uv init weather
cd weather

# Create virtual environment and activate it
uv venv
source .venv/bin/activate

# Install dependencies
uv add "mcp[cli]" httpx

# Create our server file
touch weather.py
现在让我们开始构建您的服务器。
构建您的服务器
导入包并设置实例
将这些添加到 weather.py 的顶部:
from typing import Any
import httpx
from mcp.server.fastmcp import FastMCP

# Initialize FastMCP server
mcp = FastMCP("weather")

# Constants 使用的是和风天气,原文档提供的api 国内不好用
QWEATHER_API_BASE = "https://devapi.qweather.com/v7"
QWEATHER_API_KEY = "QWEATHER_API_KEY" # 请替换为实际token
FastMCP 类使用 Python 类型提示和文档字符串自动生成工具定义,从而轻松创建和维护 MCP 工具。
帮助程序函数
接下来,让我们添加用于查询和格式化 National Weather Service API 中的数据的帮助程序函数:
async def make_qweather_request(endpoint: str, params: dict = {}) -> dict[str, Any] | None:
    """Make a request to the QWeather API with proper error handling."""
    headers = {
        "X-QW-Api-Key": f"{QWEATHER_API_KEY}"
    }

    async with httpx.AsyncClient() as client:
        try:
            url = f"{QWEATHER_API_BASE}/{endpoint}"
            response = await client.get(url, params=params, headers=headers, timeout=30.0)
            response.raise_for_status()
            print(response)
            return response.json()
        except Exception as e:
            msg = "request fail, error:%s" % e
            print(msg)
            return msg
实现工具执行
工具执行处理程序负责实际执行每个工具的逻辑。我们来添加它:
@mcp.tool()
async def get_forecast(latitude: float, longitude: float) -> str:
    """Get weather forecast for a location.

    Args:
        latitude: Latitude of the location
        longitude: Longitude of the location
    """
    # Get current weather data
    location = f"{longitude},{latitude}"
    weather_data = await make_qweather_request("weather/now", {
        "location": location,
        "unit": "m"
    })

    if isinstance(weather_data, str):
        return weather_data

    # Get 5-day forecast
    forecast_data = await make_qweather_request("weather/7d", {
        "location": location,
        "unit": "m"
    })

    if isinstance(forecast_data, str):
        return forecast_data

    # Format current weather
    current = f"""
Current Weather:
Temperature: {weather_data['now']['temp']}°C
Conditions: {weather_data['now']['text']}
Humidity: {weather_data['now']['humidity']}%
Wind: {weather_data['now']['windSpeed']} km/h
"""

    # Format forecast
    forecasts = [current]
    for day in forecast_data['daily']:
        forecast = f"""
{day['fxDate']}:
Day Temperature: {day['tempMax']}°C
Night Temperature: {day['tempMin']}°C
Conditions: {day['textDay']}
Humidity: {day['humidity']}%
Wind: {day['windSpeedDay']} km/h
"""
        forecasts.append(forecast)

    return "\n---\n".join(forecasts)
运行服务器
最后,让我们初始化并运行服务器:
if __name__ == "__main__":
    # Initialize and run the server
    print("mcp server runing start")
    mcp.run(transport='stdio')
您的服务器已完成!运行 uv run weather.py 以确认一切正常。
现在,让我们从现有的 MCP 主机 Cline 测试您的服务器。
使用 Cline 测试您的服务器
Cline 可以在 Vscode 中安装
首先,确保您已安装 包含 Cline 的 Vscode。
打开Cline,点击右上方的MCP配置按钮,然后点击左下角的Edit MCP Settings,打开配置文件,并添加下面的内容。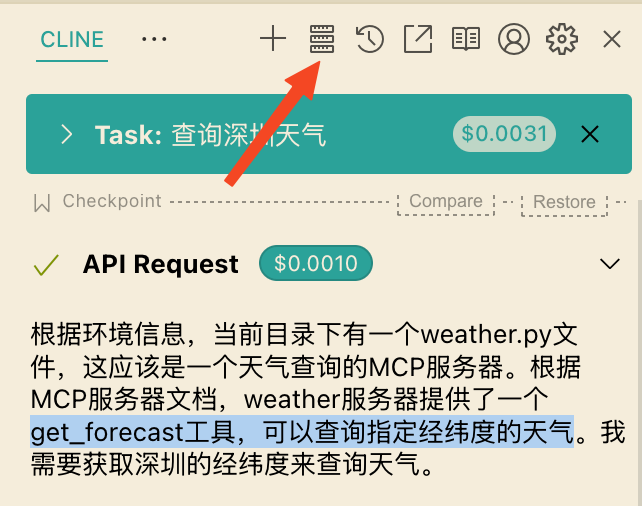

然后,您将在 mcpServers 键中添加您的服务器。如果至少正确配置了一台服务器,则 MCP UI 元素只会显示在 cline 的 已安装列表中。
在本例中,我们将添加单个 weather 服务器,如下所示:
{
    "mcpServers": {
        "weather": {
            "command": "uv",
            "args": [
                "--directory",
                "/ABSOLUTE/PATH/TO/PARENT/FOLDER/weather",
                "run",
                "weather.py"
            ]
        }
    }
}
您可能需要将 `uv` 可执行文件的完整路径放在`命令`字段中。您可以通过在 MacOS/Linux 上运行 `which uv` 或在 Windows 上运行 `where uv` 来获取此路径。
确保传入服务器的绝对路径。
这告诉 cline:
- 有一个名为 “weather” 的 MCP 服务器
- 要通过运行
uv --directory /ABSOLUTE/PATH/TO/PARENT/FOLDER/weather run weather.py
保存文件。
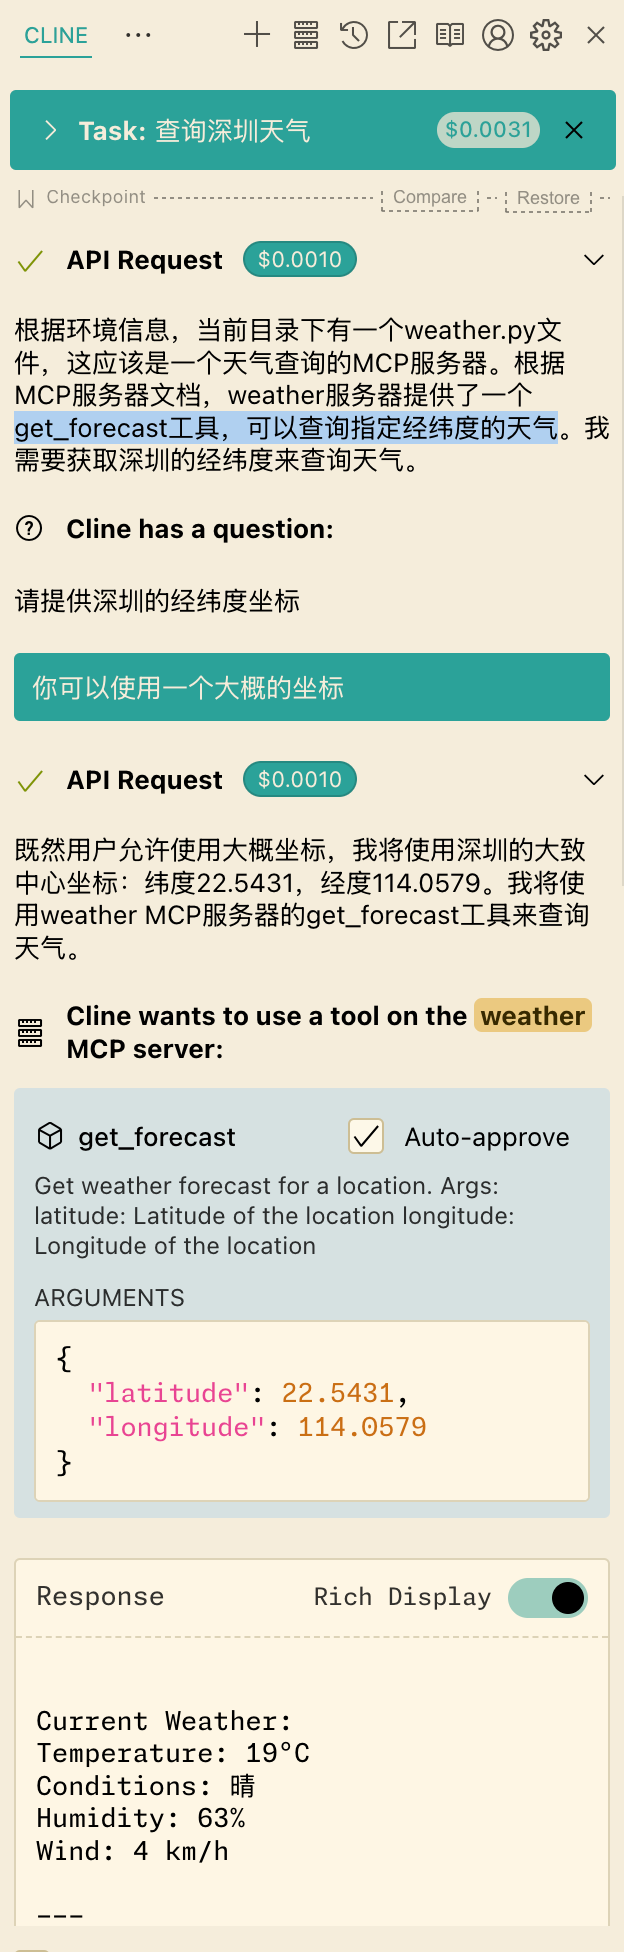
使用命令进行测试
我们在 cline 的对话框中输入查询深圳天气,cline 会找到有一个可用的 weather MCP 服务,且 提供了get_forecast工具,可以查询指定经纬度的天气。
幕后发生了什么
当您提出问题时:
- 客户将您的问题发送给 Cline
- Cline 分析可用的工具并决定使用哪一个
- 客户端通过 MCP 服务器执行所选工具
- 结果将发送回给 Cline
- Cline 制定自然语言响应
- 响应将向您显示!


